Welcome to Lisbon Data Science Academy Batch 3 Students repository. The presentation used at the introduction of the bootcamp is here.
Here is you'll find all information needed to setup your environment and the workflow you'll use during the academy.
There is also a screencast to accompany this readme. Please note that there is one known issue so far in the screencast in that the clone of the batch3-students needs to be done by URL (as is shown in this README) and not by filter.
IMPORTANT Before the bootcamp you will have to complete these instructions, this is essential.
Once you complete the setup mark yourself as such on this spreadsheet.
By completing this you will setup and learn about all the tools you'll be using during the academy. We will also be able to identify any problems in time to figure out a solution.
Having a GitHub account and knowing the basics of committing and pushing changes are mandatory. By the end of this setup you will have accomplished both.
- Install git If you're on Windows or OS X, GitHub Desktop is probably easiest.
- Sign up for a GitHub account if you don't already have one.
If you plan on using the terminal and not GitHub desktop it might be a good idea to set up ssh keys for GitHub.
The work you will be doing during the academy makes use of packages to provide extra functionality. Installing and managing different versions (that may have subtle changes) in different operating systems and ensuring everyone gets the same results is a challenging task. Anaconda is currently the best solution for this problem.
Go to Anaconda for installation instructions. BE SURE to choose "Python 3.7 version".
If you are on windows
Make sure that there are no non-english characters in your username or on the path and that you have qt installed. Here is a reference on how to address these issues.
It's good practice to store your work with version control. In this academy that is a requirement as it is how you will make your work available to us.
- Log into GitHub
- Create a new private GitHub repository called batch3-workspace, see
Creating a new repository.
IMPORTANT The repo MUST be named batch3-workspace!
If you name it anything else, you will be unable to submit any of your work!
- You need to explicitly select Private - This is your work and nobody else's. You will be graded based upon the merits of what you are able to do here so this should not be open to the world while you are working on it. Maybe after the course is completed, you can open-source it but not this time.
- Initialize with a README. This is mostly just so that you don't initialize an empty repo.
- Add a Python
.gitignore. This step is insanely important. If you don't do this, you may end up checking things into the repo that make it un-gradeable by our grading system. ADD THE.gitignorePLEASE!!!! <--- 4 *!isn't enough
Since the repository is private you will have to explicitly give access so that our grading system can fetch the repository. To do this you will be adding a deploy key to the repository, which we provide to you in our Portal.
- Head on to the Portal
- Log in with your GitHub account
- Go to your profile and
copy the deploy key
- Go back to the repository you have just created
- Go back to the repository you have just created
- Go to
Settings > Deploy Keys - Click "Add deploy key"
- Give it a recognizable name like "grader" and paste the key from the
Portal
- Click "Clone a repository from the internet..." or select
"File > Clone repository" on the menubar if this not your first time
- Filter by "batch3-workspace"
- Select and clone
- Open a Terminal or Git Bash, the next steps are on this terminal
- Clone your /batch3-workspace repository
git clone https://github.com/<username>/batch3-workspace.gitOr if you have your ssh keys set up:
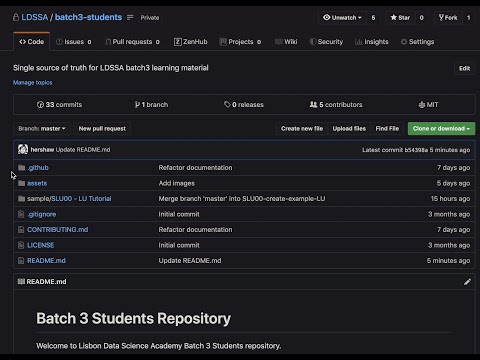
git clone git@github.com:<username>/batch3-workspace.gitYou will be cloning the batch3-students repository. All of the learning material you need will be made available on this repo as the academy progresses.
- Select "File > Clone repository" on the menubar
- Select by URL "ldssa/batch3-students"
- Select and press clone
- Open a Terminal or Git Bash, the next steps are on this terminal
- Clone the students repository batch3-students
git clone https://github.com/LDSSA/batch3-students.gitOr if you have your ssh keys set up:
git clone git@github.com:LDSSA/batch3-students.gitIn the batch3-students repository that you just cloned there is a sample
learning unit.
It's used to give instructors guidelines to produce the learning units.
We are also using it to ensure that you are able to run and submit a learning
unit.
So go ahead and copy the sample directory sample/SLU00 - LU Tutorial from the batch3-students repository to your repository (named batch3-workspace).
The grader only requires you to have the contents in a directory starting with the learning unit's ID, but we highly advise to keep the same directory structure as the students repository. All learning units are organized as:
<specialization ID> - <specialization name>/<learning unit ID> - <learnin unit name>
Doing so will help you keep organized and ease copying data from the students repository to yours.
With each learning unit you will be provided with an environment.yml file.
It tells Anaconda all the packages the learning unit depends on and it
will be used to create an Anaconda environment.
An environment is simply an isolated set of packages. When you run your code inside an environment you will have access to the same version of the packages the instructor used to create the notebooks.
- Select "Environments"
- Select "Import"
- Set
slu00for the name and select theenvironment.ymlfile in the learning unit directory (the one in yourbatch3-workspace).
cd batch3-workspace/sample/SLU00\ -\ LU\ Tutorial
conda env create -n slu00 --file environment.ymlAll learning units come as a set of Jupyter Notebooks (and some links to presentations). Notebooks are documents that can contain text, images and live code that you can run interactively.
In this section we will launch the Jupyter Notebook application. The application is accessed through the web browser.
Once you have the application open feel free to explore the sample learning unit structure. It will give you a handle on what to expect and what rules the instructors follow (and the effort they put) when creating a learning unit.
So let's start the Jupyter Notebook app.
- Click the play button next to the newly created environment and select
"Open with Jupyter Notebook"
- Activate the environment and run jupyter notebook
conda activate slu00
jupyter notebookEvery learning unit contains an exercise notebook with exercises you will work on. So let's have a look at the sample Learning Unit.
- On the Jupyter Notebook UI in the browser open the exercise notebook
- Follow the instructions provided in the notebook
Besides the exercises and the cells for you to write solutions you will see
other cells with a series of assert statements.
This is how we (and you) will determine if a solution is correct.
If all assert statements pass, meaning you dont get an AssertionError or
any other kind of exception, the solution is correct.
Once you've solved all of the notebook we recommend the following this simple checklist to avoid unexpected surprises.
- Save the notebook (again)
- Run "Restart & Run All"
- At this point the notebook should have run without any failing assertions
If you want to submit your notebook before it is all the way done to check intermediate progress, feel free to.
If you are able to go through the entire process and get a passing grade on the sample LU you'll have a good understanding of the same flow that you'll use for all LUs throughout the academy.
Now you have worked on the sample learning unit and you have some uncommitted
changes.
It's time to commit the changes, which just means adding them to your batch3-workspace
repository history, and pushing this history to you remote on GitHub.
- Use the GitHub Desktop application commit the changes and push
- Using the terminal commit and push the changes
git add .
git commit -m 'Testing the sample notebook'
git pushOur advice it to get comfortable with git, commit often and create branches
to try different solutions and once you're ready merge everything back to
the master branch.
Having all of the iterations will help you keep track of your work.
Here is a recommendation for a git workflow, if you are not comfortable you don't need to use it (but using it will make you comfortable).
- Create a branch for the learning unit you're working on e.g.
slu00 - Copy the files and commit
- Work a bit and commit, start the commit message with WIP (work in progress)
- Once you are ready checkout the
masterbranch and merge theslu00branch into it - Push the changes
- Go to the Portal and select the learning unit
- Select "Grade"
- After grading is complete you should have 20/20
- If everything passes locally but the grader doesn't give you the excepted output head to out troubleshooting
- Once you have your grade don't forget to do the spreadsheet thing.
Learning units will be announced in the academy's #annoucements channel. At this point they are available in the batch3-students repository and submissions are open in the Portal.
The steps you followed during the initial setup are exactly what you are going to be doing for each new learning unit. Here's a quick recap:
- Once a new learning unit is available pull the changes from the batch3-students repo.
- Copy the unit to your
batch3-workspacerepo - Work
- Once all tests pass or once you're happy, commit the changes and push
- Go to the Portal, select the learning unit you're working on and click "Grade"
- Refresh the page until you get the results back
- Profit
As much as we try and have processes in place to prevent errors and bugs in the learning units some make it through to you. If the problem is not in the exercise notebook you can just pull the new version from the students repo and replace the file. The problem is if the correction is in the exercise notebook, you can't just replace the file your work is there and you'll lose it!
When a new version of the exercise notebook is released (and announced) two things will happen. If you submit an old version of the notebook it will be flagged as out of date and not graded. You will have to merge the work you've already done into the new version of the notebook.
At the moment our suggestion to merge the changes is:
- Rename the old version
- Copy the new exercise notebook over
- Open both and copy paste your solutions to the new notebook
We understand it's not ideal and are working on improving this workflow using nbdime. If you are comfortable installing Python packages you can try it out, but we offer no support for this at the moment.
During the academy you will surely run into problems and have doubts about the material. We provide you with some different channels to ask for help.
If you feel something is not clear enough or there is a bug in the learning material please follow these steps. Remember, there is no such thing as a dumb question, and by asking questions publically you will help others!
If you have more conceptual questions about the materials or how to approach a problem you can also reach out to the instructors on slack. You can find the main contact for the learning unit in the Portal this instructor can help you out or redirect you to someone that is available at the moment.
Are you getting different results locally than what you are getting in the Portal? If so we will first ask to do a bit of troubleshooting.
- Ensure that you have saved the changes in the notebook
- Ensure that you have committed and pushed the changes
- Ensure that you are not using packages that are not present in the original
environment.ymlfile (changes to this file or your local environment have no effect) - In the learning unit page in the Portal
you are able to download the exercise notebook with the results of the grader
by clicking your grade, have a look to figure out what went wrong.
If none of these steps helped go ahead and open a support ticket for the portal here.
Is the Portal down or acting out in some unexpected way? Then please open a support ticket for the portal here.
If your problem doesn't fit in any of the previous categories head over to slack and ask. Someone will surely point you in the right direction.
If you're looking for some specific part of our organization head over to the Member Directory and search for the area of responsibility you're looking for.